Magic Buttons
SITE MAP | by
Hello! My name is Joe and I'm going to teach you how to make Magic Buttons! We've all seen those images that change when the mouse is over them. Well, they're not very difficult at all to make.
I've seen lately that there are some special software tools that can help you insert these mouseover effects and apparently some web editors are adding a button for that too.
So, if there are "automated" tools that do this, why should I mess around with inserting the code by hand?
Same reason you should learn to author HTML by hand... flexibility, power and confidence. The flexibility to always be able to do what you want to do without having to wrestle with some editor. The power to add, change and manipulate the script in ways the helpful tool would never be able to do. And the confidence that comes with knowing that not only can you out-manuever any editor, but if something goes wrong, you have enough of an understanding to be able to fix the glitch and be on your way while others are standing there holding their "editor".
This is a basic mouseover...
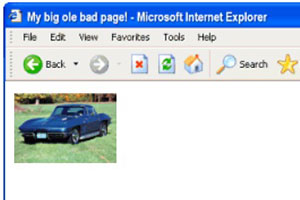
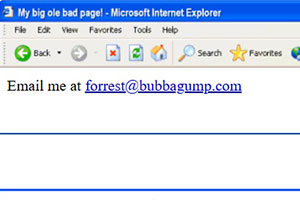
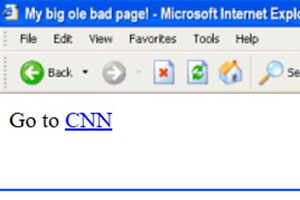
Clicking on it takes you to a another page. Here is the button on a page all by itself.
The idea behind the mouseover is very simple...
When the page first loads, it displays the following image
When the cursor passes over the image, a second image gets swapped in its place
When the cursor moves off the image, the first image is swapped back:
Let's build this example from scratch. First we'll make the target page. Copy the following and save it as another.html.
<HTML> <HEAD> <TITLE></TITLE> </HEAD> <BODY BGCOLOR="#FFFFFF" TEXT="#0000CC"> <H1 ALIGN=center>Another page!</H1> </BODY> </HTML> |
And save this as mysample1.html.
<HTML> <HEAD> <TITLE></TITLE> </HEAD> <BODY> </BODY> </HTML> |
Insert the default image...
<HTML> <HEAD> <TITLE></TITLE> </HEAD> <BODY> <IMG SRC="clickme1.gif" WIDTH="75" HEIGHT="22" BORDER="0" ALT="" NAME="img01"> </BODY> </HTML> |
At this point in time, it's not overly important that you understand exactly what's going on here. Just build the thing one piece at a time.
Insert <SCRIPT> tags...
<HTML> <HEAD> <TITLE></TITLE> <SCRIPT LANGUAGE="JavaScript"><!-- //--></SCRIPT> </HEAD> <BODY> <IMG SRC="clickme1.gif" WIDTH="75" HEIGHT="22" BORDER="0" ALT="" NAME="img01"> </BODY> </HTML> |
Insert the image preloading statements. These cause the image files to download and get into the browser's cache so the mouseover works smoothly. This should be done for every image you use in the effect...
<HTML>
<HEAD>
<TITLE></TITLE>

<SCRIPT LANGUAGE="JavaScript"><!--

// preload images:
if (document.images) {
clickme1 = new Image(75,22); clickme1.src = "clickme1.gif";
clickme2 = new Image(75,22); clickme2.src = "clickme2.gif";
}

//--></SCRIPT>

</HEAD>
<BODY>

<IMG SRC="clickme1.gif" WIDTH="75" HEIGHT="22"
BORDER="0" ALT="" NAME="img01">

</BODY>
</HTML>
|
Next add the function. This is the "engine" if you will. Tell it which image to swap with what, and it does it.
<HTML>
<HEAD>
<TITLE></TITLE>

<SCRIPT LANGUAGE="JavaScript"><!--

// preload images:
if (document.images) {
clickme1 = new Image(75,22); clickme1.src = "clickme1.gif";
clickme2 = new Image(75,22); clickme2.src = "clickme2.gif";
}

function hiLite(imgName,imgObjName) {
if (document.images) {
  document.images[imgName].src = eval(imgObjName + ".src");
}}

//--></SCRIPT>

</HEAD>
<BODY>

<IMG SRC="clickme1.gif" WIDTH="75" HEIGHT="22"
BORDER="0" ALT="" NAME="img01">

</BODY>
</HTML>
|
And lastly add the credit. (Optional of course)
<HTML>
<HEAD>
<TITLE></TITLE>

<SCRIPT LANGUAGE="JavaScript"><!--
/*********************************************************
              M A G I C  B U T T O N S  v3.1
             https://www.htmliseasy.com/buttons/
      Permission is granted to freely use this script.
**********************************************************/

// preload images:
if (document.images) {
clickme1 = new Image(75,22); clickme1.src = "clickme1.gif";
clickme2 = new Image(75,22); clickme2.src = "clickme2.gif";
}

function hiLite(imgName,imgObjName) {
if (document.images) {
  document.images[imgName].src = eval(imgObjName + ".src");
}}

//--></SCRIPT>

</HEAD>
<BODY>

<IMG SRC="clickme1.gif" WIDTH="75" HEIGHT="22"
BORDER="0" ALT="" NAME="img01">

</BODY>
</HTML>
|
Now add a standard link...
<HTML>
<HEAD>
<TITLE></TITLE>

<SCRIPT LANGUAGE="JavaScript"><!--
/*********************************************************
              M A G I C  B U T T O N S  v3.1
            https://www.htmliseasy.com/buttons/
      Permission is granted to freely use this script.
**********************************************************/

// preload images:
if (document.images) {
clickme1 = new Image(75,22); clickme1.src = "clickme1.gif";
clickme2 = new Image(75,22); clickme2.src = "clickme2.gif";
}

function hiLite(imgName,imgObjName) {
if (document.images) {
  document.images[imgName].src = eval(imgObjName + ".src");
}}

//--></SCRIPT>

</HEAD>
<BODY>

<A HREF="another.html"><IMG SRC="clickme1.gif" WIDTH="75" HEIGHT="22"
BORDER="0" ALT="" NAME="img01"></A>

</BODY>
</HTML>
|
Then add the javascript commands to the link...
<HTML>
<HEAD>
<TITLE></TITLE>

<SCRIPT LANGUAGE="JavaScript"><!--
/*********************************************************
              M A G I C  B U T T O N S  v3.1
            https://www.htmliseasy.com/buttons/
      Permission is granted to freely use this script.
**********************************************************/

// preload images:
if (document.images) {
clickme1 = new Image(75,22); clickme1.src = "clickme1.gif";
clickme2 = new Image(75,22); clickme2.src = "clickme2.gif";
}

function hiLite(imgName,imgObjName) {
if (document.images) {
  document.images[imgName].src = eval(imgObjName + ".src");
}}

//--></SCRIPT>

</HEAD>
<BODY>

<A HREF="another.html"
   onMouseOver="hiLite('img01','clickme2')"
   onMouseOut="hiLite('img01','clickme1')"><IMG
   SRC="clickme1.gif" WIDTH="75" HEIGHT="22"
   BORDER="0" ALT="" NAME="img01"></A>

</BODY>
</HTML>
|
And that's it!
Get this working and in part 2 we'll examine a little more closely what's going on.
We'll examine the code to learn what's happening.
// preload images:
if (document.images) {
clickme1 = new Image(75,22); clickme1.src = "clickme1.gif";
clickme2 = new Image(75,22); clickme2.src = "clickme2.gif";
}
This part pre-loads the images. The images are downloaded into the browser's cache so they're here when the mouseover happens. The alternative would be to have the image download during the mouseover... which would look terrible. We want it to be instantaneous. Each of the lines above are for one image. The easiest way to do this for now is just use the filename of the image all the way across. The numbers are the image width & height. Note that all images used in a particular location need to be all the same size.
Let's suppose you wanted to use two images named switch_up.gif and switch_dn.gif, and these images were 55 pixels wide and 70 pixels tall. You would construct the preloading statements as follows...
switch_up = new Image(55,70); switch_up.src = "switch_up.gif";
switch_dn = new Image(55,70); switch_dn.src = "switch_dn.gif";
To add images, just add statements...
switch_up = new Image(55,70); switch_up.src = "switch_up.gif";
switch_dn = new Image(55,70); switch_dn.src = "switch_dn.gif";
image1 = new Image(80,20); image1.src = "image1.gif";
image2 = new Image(80,20); image2.src = "image2.gif";
Now look at the function...
function hiLite(imgName,imgObjName) {
if (document.images) {
  document.images[imgName].src = eval(imgObjName + ".src");
}}
Think of it as the batter in a ball game that swings at anything you throw at it. Throw an apple and an orange, it swings. Throw a banana and a barbie doll, it swings. Except our batter is a function that processes variables that we send to it.
We send those variables in the link...
<A HREF="another.html"
   onMouseOver="hiLite('img01','clickme2')"
   onMouseOut="hiLite('img01','clickme1')"><IMG
   SRC="clickme1.gif" WIDTH="75" HEIGHT="22"
   BORDER="0" ALT="" NAME="img01"></A>
This is just a simple image link to another.html but with a couple additions.
Look at the first javascript command: onMouseOver="hiLite('img01','clickme2')". Translated this says "On mouseover, send the variables img01 and clickme2 to the function hiLite()"
The second javascript command is very similar - onMouseOut="hiLite('img01','clickme1')". Translated this says "On mouseout, send the variables img01 and clickme1 to the function hiLite()"
Note the NAME attribute in the IMG tag - NAME="img01". This puts a label on that particular image. It distinguishes it from every other image on the page. Each image location where you want an effect needs a different name. If you have three links - Home, Links & Email, they must each have a different name (img01, img02, img03 or homepic, linkpic, emailpic etc)
The function hiLite() knows what to swap where depending on what variables we send to it. In the link, when we write onMouseOver="hiLite('img01','clickme2')" we are sending variables to the function. We are saying "On Mouseover, take img01 and clickme2 and process accordingly." When the function gets the variables, it says "No problem" and proceeds to instantly place clickme2 in image location img01. (The only reason it happens instantly is because we've taken the time to preload the images.)
Also, for this simple mouseover, there's nothing we need to alter in the function. We add images to preload, we configure the link, but we don't do anything with the function.
Now, The best way to learn is to do. On that basis, I have something for you to do. Make a page from scratch and insert a mouseover using these two images...
Make it so that it starts out dark. When you mouse over it, it turns red, and when you click on it, you go to your homepage. (If you don't have a homepage yet, point it to my homepage.)
Then add a second and third mouseover to the same page using these images...
After completing these exercises you can consider yourself an old hand at adding mouseovers. Next we'll build on what we know and add a few more items to our bag of tricks.
Now, before moving on, I'm compelled to say something here. I suspect that some of you may be simply skimming through these instructions and maybe skipping these exercises. If your goal is to skim through so you can say that you read about how to add mouseovers images... fine. You've accomplished your goal. If, on the other hand, your goal is to actually learn how to do it so you can actually add mouseover effects to an actual page, then do the exercises. My instructions make up about 10% of your learning. Actually doing it is the other 90%... the important part. Remember, you learn by doing.
After that last exercise you should have something like this...
Here is this effect on a page by itself.
| Throughout these lessons you'll find many images used. I've put them all on a page so you can grab them to practice with. |
What else can we do with this new found skill?
Well, we can fiddle with the variables that we send to the function to allow a mouseover of one image to effect a change in another...
And here is the code for the above effect:
<A HREF="javascript:nada()"
   onMouseOver="hiLite('img04','camera_on')"
   onMouseOut="hiLite('img04','camera_off')"><IMG
      SRC="flash.gif" WIDTH="64" HEIGHT="16" BORDER="0" ALT="Flash"></A>
<IMG SRC="camera_off.gif" WIDTH="42" HEIGHT="44" BORDER="0" ALT="Camera" NAME="img04">
And here are the image preloading statements:
camera_off = new Image(42,44); camera_off.src = "camera_off.gif";
camera_on =  new Image(42,44); camera_on.src =  "camera_on.gif";
Notice the camera image is named img04. It isn't a link and there are no onMousever statements attached to it. In this instance it's just an ordinary image. Now, the flash image is the one that does the controlling. Look at it closely and you'll see that it sends variables to the function. On mouseover it sends img04 & camera_on to the function. The function dutifully places image camera_on into image location img04. On mouseout, two more variables are sent to the function reverting it back. This effectively demonstrates that you can control any image on the page from anywhere else on the page.
You'll notice the link points to a second function - nada(). This is an empty function, it does absolutely nothing. Why is it there you ask? Because with some browsers, the only way events such as OnMouseOver will work, is if they are in a link. If you want something that is technically a link, yet does nothing, make the link point to a dead function. Now we have a mouseover that works with most browsers and a link that won't do anything if someone should happen to click on it.
This is the empty function that can go within your <SCRIPT> tags with your other function...
function nada() {
}
What if we want something else showing up in the staus bar besides "function nada()"? Easy, just add the following to your link...
<A HREF="javascript:nada()"
   onMouseOver="hiLite('img04','camera_on');self.status='Clickity-click'; return true"
   onMouseOut="hiLite('img04','camera_off');self.status=''; return true"><IMG
      SRC="flash.gif" WIDTH="64" HEIGHT="16" BORDER="0" ALT="Flash"></A>
<IMG SRC="camera_off.gif" WIDTH="42" HEIGHT="44" BORDER="0" ALT="Camera" NAME="img04">
The first line places a message in the status bar on mousever and the second line removes it on mouseout.
You can use an ordinary text link to affect an image..
<A HREF="javascript:nada()"
   onMouseOver="hiLite('img04','camera_on')"
   onMouseOut="hiLite('img04','camera_off')">Flash</A>
<IMG SRC="camera_off.gif" WIDTH="42" HEIGHT="44" BORDER="0" ALT="Camera" NAME="img04">
We could combine these effects into a pretty cool text & image menu...
- Home
 Links
Links
Email
Here is this effect on a page by itself.
And here is the exact coding for that mouseover menu...
<UL>
<FONT FACE="verdana,arial,helvetica">
<IMG SRC="red_arrow_off.gif" WIDTH="12" HEIGHT="14" BORDER="0" ALT="" NAME="img07" HSPACE=2>
<A HREF="home.html"
   onMouseOver="hiLite('img07','red_arrow_on');self.status='My HomePage'; return true"
   onMouseOut="hiLite('img07','red_arrow_off');self.status=''; return true">Home</A>
<BR>
<IMG SRC="red_arrow_off.gif" WIDTH="12" HEIGHT="14" BORDER="0" ALT="" NAME="img08" HSPACE=2>
<A HREF="links.html"
   onMouseOver="hiLite('img08','red_arrow_on');self.status='My Links Page'; return true"
   onMouseOut="hiLite('img08','red_arrow_off');self.status=''; return true">Links</A>
<BR>
<IMG SRC="red_arrow_off.gif" WIDTH="12" HEIGHT="14" BORDER="0" ALT="" NAME="img09" HSPACE=2>
<A HREF="mailto:me@home"
   onMouseOver="hiLite('img09','red_arrow_on');self.status='Email Me'; return true"
   onMouseOut="hiLite('img09','red_arrow_off');self.status=''; return true">Email</A>
</FONT>
</UL>
And these are the preload statements...
red_arrow_off = new Image(12,14); red_arrow_off.src = "red_arrow_off.gif";
red_arrow_on =  new Image(12,14); red_arrow_on.src =  "red_arrow_on.gif";
Take a minute to study what's going on here. It looks complicated, but it's really not.
Here is another exercise that will help you get the ideas firmly embedded in your mind and the skill firmly secured under your belt. Reproduce the following effect...
| Canadian Goose Cockatoo Pigeon Stork Swan Toucan |
 |
All the images you'll need are here.
This completed exercise is here.
Once again, by actually doing the exercise, you'll gain invaluable experience. And believe me, experience is far more valuable to you than Joe Barta's ramblings.
Are we done yet? Oh no. There's much more to learn and more effects to play with. On to part 4.
Let's learn about two more events - onMouseDown and onMouseUp. These are fairly self explanatory. Here is an example...
Here is this effect on a page by itself.
Note that onMouseDown and onMouseUp are supported by newer browsers only (NN4+, IE4+). Older browsers will only display an effect onMouseOver. Really old browsers, or browsers with javascript turned off won't do anything except render the original image. For those with javascript turned off, if your HREF attribute points to a URL, the user will go there. If it points to a javascript function, nothing will happen.
Here is the code for the above effect along with the image preloading statements and the three images used...
<A HREF="javascript:nada()"
   onMouseOver="hiLite('img01','press___up')"
   onMouseOut="hiLite('img01','press_init')"
   onMouseDown="hiLite('img01','press_down')"
   onMouseUp="hiLite('img01','press___up')"><IMG
      SRC="press_init.gif" WIDTH="56" HEIGHT="22" BORDER="0" ALT="" NAME="img01"></A>
The preloading statements..
press_init = new Image(56,22); press_init.src = "press_init.gif";
press___up = new Image(56,22); press___up.src = "press___up.gif";
press_down = new Image(56,22); press_down.src = "press_down.gif";
The images...


Place a url in the link (<A HREF="somewhere.html") and it will take you somewhere...
Of course you can also integrate this into other javascript methods and functions. Try each of these...
The above effects on a page by themselves... effect 1 - effect 2
I'll take this time to explain another event. The onClick event. Here is an example that executes one of the previous javascript functions...
<A HREF="javascript:sayHi()"
   onMouseOver="hiLite('img05','clickme2')"
   onMouseOut="hiLite('img05','clickme1')"
   onClick="sayHi(); return false"><IMG
      SRC="clickme1.gif" WIDTH="75" HEIGHT="22" BORDER="0" ALT="" NAME="img05"></A>
Normally this event handler is not used in a mouseover link to a url or function. One circumstance where it would come in handy is a web server that alters your links. The only one that comes to mind is XOOM although there may be more. When you click on a link in a page on XOOM and the link supposedly points to page.html, XOOM alters that link behind the scenes to actually look for _XOOM/page.html (or something like that). An ill-concieved mechanism such as this can find separate html pages with no problem. BUT, when the link points to myfunction(), the browser is tricked into looking for _XOOM/myfunction(). Since it doesn't exist, the function doesn't execute. What's the cure? (You mean besides get your pages off of XOOM and tell them to eat your shorts?) If you add an onClick event handler to the link, you can sidestep this problem because most browsers will honor the instructions in onClick() before the instructions in the HREF attribute. Another reason to use onClick is so that you can "return false". Without getting into detail, this kills a sticky hourglass problem in Netscape.
Can you use an animated gif in a mouseover?
Why yes, we can...
Here is this effect on a page by itself.
But... we have do do things a teensy bit differently. We don't preload the images. As far as why, I'll defer to a USENET post by Christopher John Robb...
| "Here's the thing: animated gifs start animating when they are loaded, not when they are shown on the screen. When you preload them, they are run once. Without the loop, they are lying in a dormant state. You can't preload these suckers without a loop- and even then, there's no promise that the user won't move the mouse over or out of the link in the middle of the loop. I don't know this for sure, but it fixed my problem when I took out the preloading." |
So, this is what's going on in that last example...
<A HREF="home.html"
   onMouseOver="hiLite2('img06','anihome_up.gif')"
   onMouseOut="hiLite2('img06','anihome_down.gif')"><IMG
      SRC="anihome_static.gif" WIDTH=60 HEIGHT=25 NAME="img06" BORDER=0 ALT="Home"></A>
Notice in the code above we are sending to the function the image location and the image source (as opposed to the image object name.)
Also we're using a slightly modified function for this example...
function hiLite2(imgName,imgSrc) {
if (document.images) {
document.images[imgName].src = imgSrc
}}
It's similar, yet operates slightly differently.
Can we combine mouseovers with image maps?
Yes... but.... It can get a little tricky. There are a few things we must take into consideration...
- We must be very precise with our map coordinates.
And because we're relying on javascript for navigation, - We should take into consideration those who have javascript disabled
- We should take into consideration those browsers that can't do mouseovers.
Here is a separate page with this effect all by itself.
This effect is made up of five images...
Depending on the position of the mouse, one of the five images is displaed. The tricky part is how to get the image to not only display the last four images, but to revert back to the first image onMouseOut... and all without a nasty flicker.
The key is in the map coordinates. Look at the following image. This is how the image map is cut up.

When the cursor is over the blue, yellow, purple or green areas, the appropriate expanded image is displayed. As the cursor passes over the red area, both the MouseOver and the MouseOut are set to the collapsed image (that is, the first image in the row above). This is an important point. Note that in the MAP code the first four areas define a part of the image but the last area encompasses the entire image. In the event of conflicting coordinates, the browser places the highest priority to the first area listed. So, as you move your cursor around, if it is over one of the smaller areas, that mouseover takes precedence and the appropriate image is displayed. As you move the cursor towards the edge of the image the last area code kicks in and the image pops closed.
It is important to look at the coordinates. If you look closely at the numbers, you'll see that there is slight overlap between the areas. The coordinates are defined as follows...
"x,y,xx,yy" translates into:

x,y
 +----------------------+
 |                      |
 |                      |
 +----------------------+
                       xx,yy
You'll see the yy value of one area is identical to the y value of the area below (24&24, 38&38, 54&54). This is a one pixel "overlap" between the areas. This is important because it prevents the image from flickering between areas.
Another thing I've done is to take into consideration surfers with their javascript disabled. Some folks get really worried about javascript (personally I think their fears are largely exxagerated). If you want to allow them to navigate your pages, you have a little extra work to do.
Here is the code for the effect...
<SCRIPT LANGUAGE="javascript"><!--
   document.write("<P><A HREF=\"javascript:nada()\"><IMG SRC=\""+picture_source+"\" width=76 height=76 NAME=\"img09\" border=0 USEMAP=\"#dir1\"></A>");
   //--></SCRIPT>
<NOSCRIPT>
   <IMG SRC="dir_down_1.gif" WIDTH="76" HEIGHT="76" BORDER="0" USEMAP="#dir2" ALT="Directory: Home-Mail-Links">
   </NOSCRIPT>
The red portion is the part for those with javascript. It actually writes the code using javascript so if javascript is disabled, it won't write and the </NOSCRIPT> section will kick in. That noscript section simply displays a static expanded image that points to a second set of map coordinates. Once again, it may sound complex, but it's really not. It's just a few simpler things combined into one.
The last precaution we'll take is to concern ourselves with browsers that have javascript, and have it enabled, but it's an older version of javascript and it doesn't recognise the image object which makes it mouseover-incapable. We do this with the following bit of code in the head tags...
if(document.images){
  picture_source = "dir_up.gif"
}else{
  picture_source = "dir_down_1.gif"
}
Translated this says "If the browser supports the image object, display the collapsed image. If not, display the expanded image."
If you look at how we wrote the code to display the image...
<SCRIPT LANGUAGE="javascript"><!--
   document.write("<P><A HREF=\"javascript:nada()\"><IMG SRC=\""+picture_source+"\" width=76 height=76 NAME=\"img09\" border=0 USEMAP=\"#dir1\"></A>");
   //--></SCRIPT>
<NOSCRIPT>
   <IMG SRC="dir_down_1.gif" WIDTH="76" HEIGHT="76" BORDER="0" USEMAP="#dir2" ALT="Directory: Home-Mail-Links">
   </NOSCRIPT>
...you'll see the variable picture_source plugged in for this purpose.
Once again, this is a bit more than a simple mouseover and if you want to study it, you should really look at the effect on a page all by itself.
In part five we'll do still more with the humble mouseover...
Mouseovers can be used for all sorts of things. Here is one used to update the contents of a textarea...
Note that although this may look like some sort of text effect, it is not. The "text" is really images. This effect on a page by itself.
Next is an example of what I call a "sticky button". A sticky button is a button that acts as a switch. You click it and it "sticks" until you click it again.
This effect on a page by itself.
This is accomplished using a variable in the script that is initially set to "off". When the effect is clicked, that variable is checked to see if it's currently on or off. If off, it does one thing and sets the variable to on. If on, it does a different thing and sets the variable to off.
Here is another example that is used to update frames. This is a little more complex because it "remembers" what is pressed and what is not. Also if you press an already depressed button, it will pop back up. Keep in mind that this is a javascript powered navigation aid. If your visitor has his javascript turned off, or is using a non-js capable browser, he won't get very far. Notice in the script is a <NOSCRIPT> section that inserts plain text links for these folks. It's a little messy, but it gets the job done effectively and efficiently.
Here is a barebones sticky button in the form of a simple switch.
This effect on a page by itself.
Here is a javascript clock that uses images changed by javascript....
As you can see, there is much potential for sprucing up a page using these mouseover effects. Javascript is a wonderful tool you can use in your pages. With it you can control much of what is on a web page. Every new browser version supports even more powerful Javascript.
I've been asked many times what is the best way to learn javascript. To that I answer "The same way you learn any skill... practice." In this tutorial I've suggested a few exercises. This is where you will do most of your learning. As I've said before, you learn by doing. The more you do, the more proficient you become. You don't learn a skill like you learn your ABC's. You learn a skill like you would learn karate... through many hours of practice and successive skill levels. The more you practice, learn and hone your skills, the "better" you get at it. It's like hiking up a very long hill... you never really get to the top, you just move higher up the hill.
We live in a "drag & drop" and "point & click" computer age. We have been sold on "easy", "quick" and "no effort required". While this all fine and it can certainly be called progress, some of us pay a heavy price for this convenience. We expect immediate gratification for our efforts. Often we expect great results from literally only a few minutes worth of effort. This trend leaves many of us with a severe handicap. We are not used to, and barely capable of, making a concerted effort over a period of time to achieve moderate but consistent results. And, this is exactly what is needed to "learn" javascript.
One of the absolute best resources to have nearby is Netscape's javascript reference. They have an online version, and the references are also downloadable.
Also of great help are the numerous javascript sites scattered about the Internet. A small listing of exceptional sites is available here. One that I want to single out is www.irt.org. What started as a Martin Webb's FAQ for the comp.lang.javascript newsgroup has evolved into an outstanding collection of highly useful javascript information along with articles and FAQs on other web authoring subjects. A definite must-visit.
Well, that's it for this tutorial. I hope you have as much fun building mouseovers as I have had telling you about it.
Have fun!
Joe Barta